4

I'm trying to manage this project on JIRA. I want to invite my client to create issues, modify them, and change their status, but all this in only his project. He can't see my projects list, he can't create issues in other projects. All he can see in his window is nothing but and only one project. His.

I followed many tutorials but they seem so difficult. Can you help me? Thanks.
1
  • I have added an aswer with images to explain better the process and links to the related info.
    – Jorgesys
    Commented Oct 26, 2018 at 23:00

3 Answers 3

2

First you have to make sure his JIRA user has the Browse Projects permission in the permission scheme of the projects he´s allowed to see. Then make sure he has the Create Issues and Edit Issues permissions in that same scheme.

1

First, you need to be a JIRA administrator (or possibly just an admin of that one Project; I'm not sure). Also, the client must have a JIRA account.

  1. Go to the JIRA Project in question (the one to which you wish to give the client permission).
  2. Press the cog in the bottom left to go to 'Project Administration'
  3. Press 'Permissions Schemes' in the left sidebar
  4. Select 'Add Permission Scheme' button at the bottom
  5. Give it a name then press the 'Add' button
  6. Back at the Permissions Schemes section, find your new scheme and press the 'Permissions' link to its right.
  7. Press the 'Grant permission' link near the top
  8. Select the permissions which you wish to add (ctrl-click to select multiple). If unsure what a particular permission does, explanations are shown in the previous screen.
  9. Select the 'Single User' radio button
  10. Input your client user in the box next to that radio button
  11. Press Add
  12. Go to the administration for your client's JIRA project (from its JIRA page, press the cog in the bottom-left in the sidebar).
  13. Go to 'Permissions' in the left sidebar
  14. Go to the 'Actions' (containing a cog) dropdown on the right
  15. Select 'Use a different scheme'
  16. Select your new scheme and press the 'Associate' button.

And you're done.

Note: The good part about this is that if your client later needs access to a second Project, you only need to perform steps 12-15 for that project; they will share the same scheme.

0

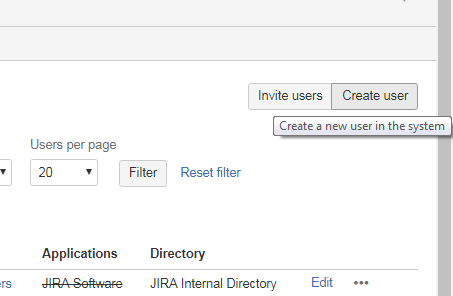
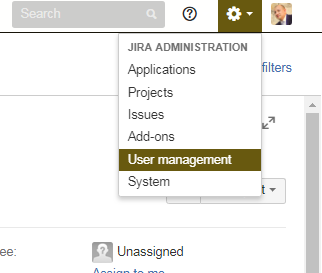
Go to Settings > User management

enter image description here

First of all you need to create the users in the system

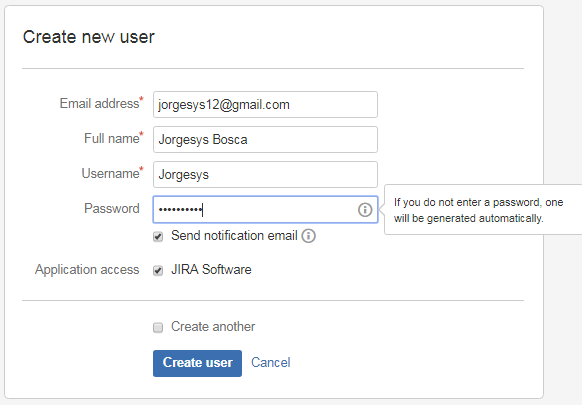
enter image description here

Enter the information for the user:

  • If you do not enter a password, one will be generated automatically.
  • You can send an email to the user you have just created, wich will allow them to set up their password (if applicable).

enter image description here

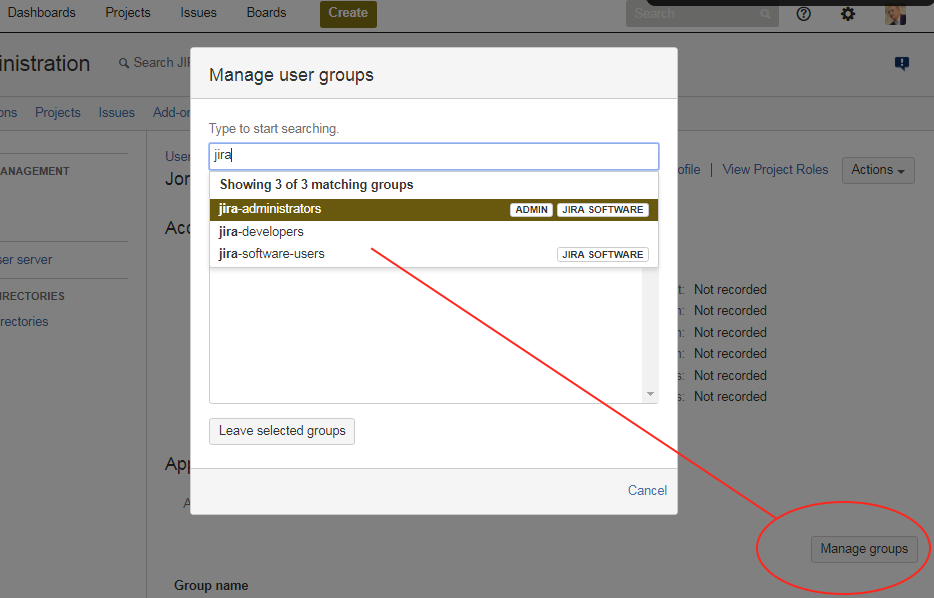
When the user was created then you can manage user groups that has different access and permissions

enter image description here

enter image description here

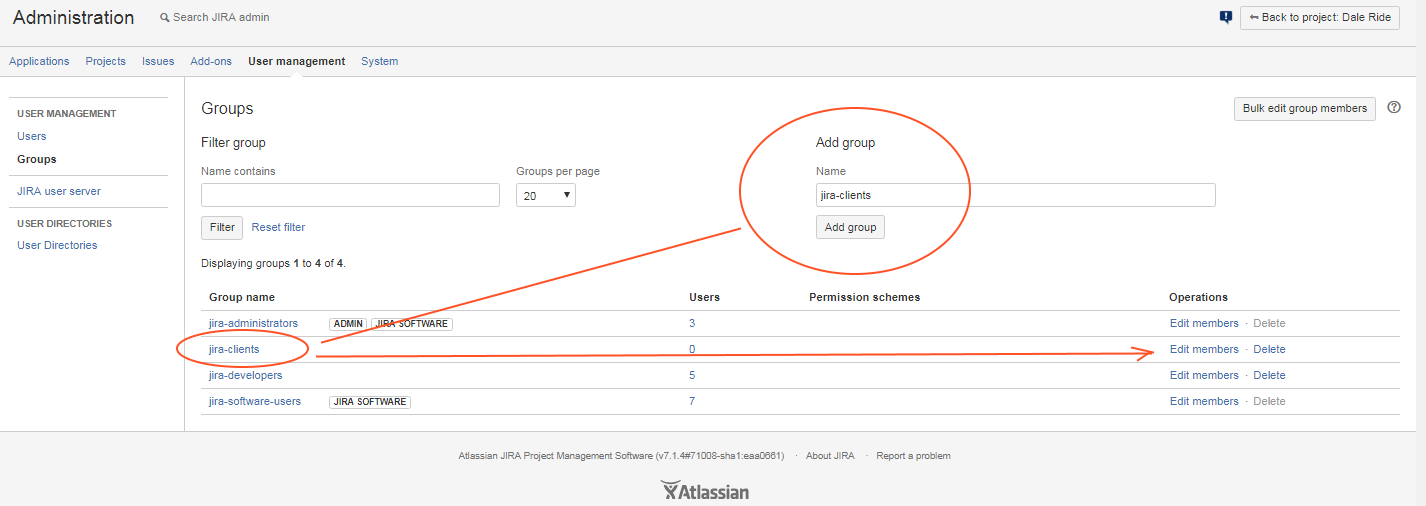
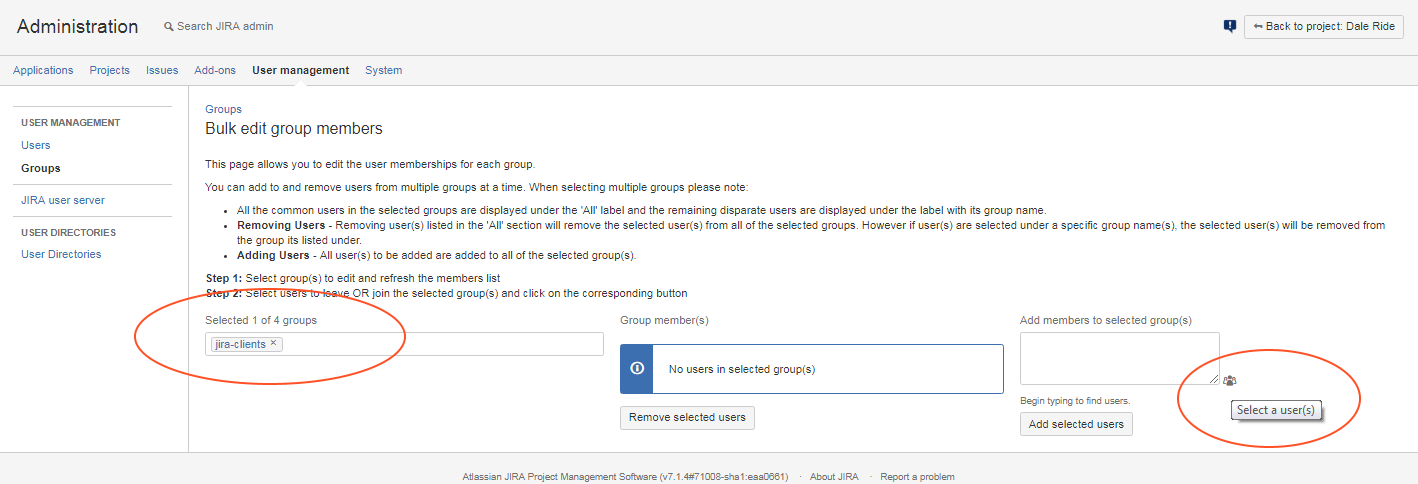
If you want to invite clients, consider to add a group for this:

enter image description here

and then add the members that were previously registered in the system:

enter image description here


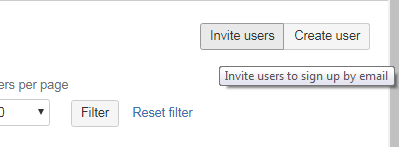
You can too invite a bulk of users via email:

enter image description here

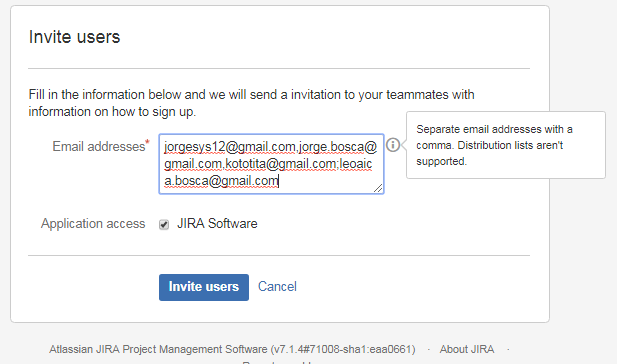
you can add the email addresses to be registered in Jira:

enter image description here


You can find more info here:

Your Answer

By clicking “Post Your Answer”, you agree to our terms of service and acknowledge you have read our privacy policy.

Not the answer you're looking for? Browse other questions tagged or ask your own question.